
Water well drilling comes with challenges like mixed formations, equipment limits, and rising costs. The key to overcoming them is choosing the right drill bit. This guide shows you how to match bits to ground conditions, avoid common problems, and maximize drilling efficiency.
Why Drill Bits Matter In Water Well Drilling
Drill bits are the first point of contact between your rig and the earth. They cut, grind, and fracture materials to open a path for the casing and pump. But beyond cutting, they also determine how straight your hole runs, how stable the borehole walls remain, and how long your equipment lasts. Choosing wisely doesn’t just speed up drilling—it directly affects the long-term quality and performance of the well.
Challenges Drillers Face In The Field
Formation Uncertainty And Mixed Geology
Water wells rarely pass through a single, predictable type of soil. Instead, you might hit clay near the top, gravel at mid-depth, and limestone or granite deeper down. Using a one-size-fits-all bit often means slow drilling or damaged tools. The smarter approach is to plan for formation changes and keep backup bit types ready.
High Cost Per Foot From Wrong Choices
A low-cost bit can look attractive, but if it fails early or drills slowly, the real cost per foot skyrockets. Every trip out of the hole adds downtime, fuel, and labor costs. Thinking in terms of cost per foot, not just sticker price, helps drillers make smarter investments.
Poor Hole Quality Affecting Casing And Yield
A crooked or over-enlarged hole may still reach water, but it makes casing installation difficult and can reduce pump efficiency. Bits with strong gauge protection and stabilizers help maintain borehole quality and ensure a well that produces consistently over time.
How To Choose The Right Drill Bit: A Practical Guide
Step 1: Assess The Formation Before You Drill
Start by gathering as much information as possible. Review local geological surveys, talk to nearby drillers, or check previous well logs. If you expect sticky clay, choose a bit with an anti-balling design. If granite is likely, prepare a down-the-hole (DTH) hammer. The better you know your ground, the better your drilling plan.
Step 2: Match Bit Type To Formation
- Drag bits: Fast and economical in soft soils like clay or loose sand, but they clog easily in sticky formations.
- Tricone bits: The all-rounder—works well in mixed and unpredictable layers.
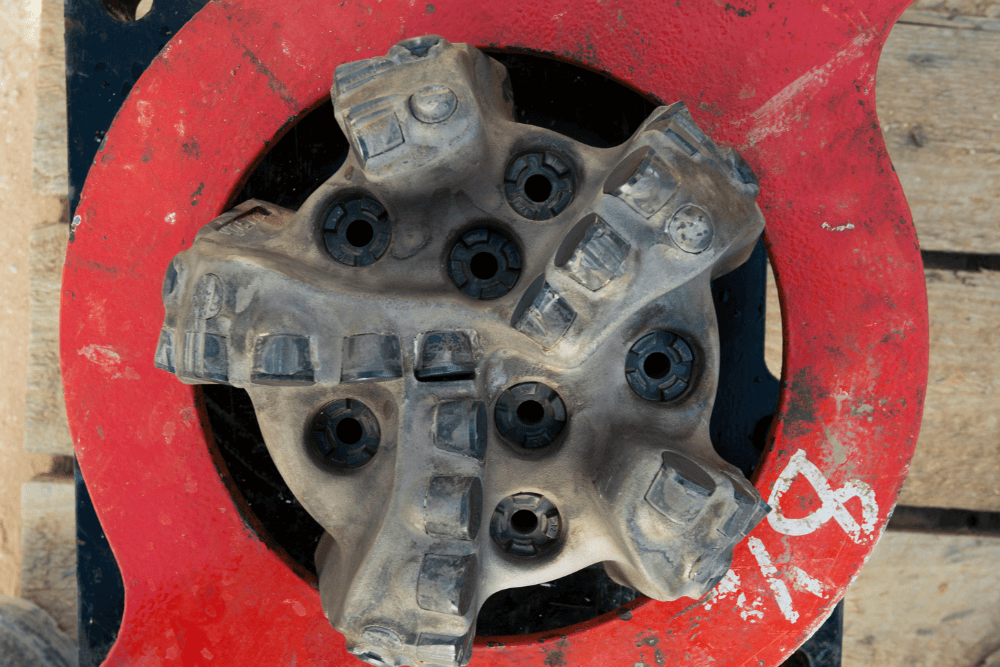
- PDC bits: Efficient in medium to hard, consistent formations where steady penetration matters.
- DTH hammer bits: The best choice for hard, abrasive rock or when you encounter boulders.
Step 3: Align Bit With Rig Capacity
Even the best bit fails if your rig can’t support it. Always check torque, weight on bit (WOB), RPM range, and compressor or pump output. For example, a PDC bit may promise great speed, but if your rig can’t maintain proper circulation, cutters will wear quickly.
Step 4: Size The Hole For Long-Term Well Quality
Your borehole should be about 2–4 inches larger than the casing you plan to install. For example, a 6-inch casing typically needs an 8–9 inch borehole. This ensures enough room for gravel pack and proper well development.
Related Reading: Water Well Drill Bits for Sale – Durable, Efficient & Ready for All Formations
Tips To Get The Best Performance From Your Bit
Control Drilling Parameters
Each bit type responds differently:
- PDC Drill Bit: Needs moderate WOB with higher RPM to cut efficiently.
- Tricone: Performs best with heavier WOB but lower RPM to avoid bearing damage.
- DTH hammer: Relies on impact energy—feed too hard and you’ll stall the hammer.
Getting parameters right prevents premature wear and maximizes penetration rate.
Maintain Cleaning And Cooling
Bits don’t just cut—they need to stay clean. Without proper circulation, cuttings recirculate, causing overheating and damage. In air drilling, make sure compressors deliver enough volume. In mud drilling, adjust viscosity and flow to lift material effectively.
Monitor Wear And Adjust Early
Keep a simple drilling log that tracks ROP (rate of penetration), torque, and bit condition. If penetration slows or torque spikes, stop and inspect. Replacing a dull bit early is cheaper than fishing a broken one later.
How To Fix Common Bit Problems
Bit Balling In Clay
- Cause: Sticky clay builds up on the cutting face.
- Fix: Use bits with wide junk slots, improve mud properties with polymers, and increase circulation.
PDC Cutter Chipping In Cobbles
- Cause: Impact damage when hitting hard inclusions.
- Fix: Switch to a tricone or DTH hammer until you clear the cobbles.
Tricone Bearing Burnout
- Cause: Excess weight or poor lubrication.
- Fix: Reduce WOB, shorten drilling runs, and maintain clean drilling fluid.
Hole Deviation Or Washout
- Cause: Aggressive cutting in fractured or soft zones.
- Fix: Add stabilizers, lower WOB, and use a less aggressive bit design.
FAQs About Choosing Drill Bits For Water Wells
Can One Bit Handle The Entire Well?
Sometimes, but rarely. Mixed formations usually require at least one change.
What’s Best For A Shallow Domestic Well?
A tricone offers flexibility, while drag bits are economical for soft soils.
When Should I Use A DTH Hammer?
In hard, abrasive formations or when drilling through boulders.
How Do I Know If My Bit Is Wearing Out?
Watch for slower penetration, higher torque, or increased vibration. These are early warning signs.
Conclusion
Maximizing water well drilling isn’t about finding the “strongest” bit or the “cheapest” option—it’s about choosing the right bit for the formation, your rig, and your budget. By assessing ground conditions, matching bit types to formations, and carefully managing drilling parameters, you’ll save money, reduce downtime, and deliver a higher-quality well.
The next time you prepare for a drilling project, think beyond the catalog specs. A smart bit choice isn’t just a tool—it’s the key to finishing faster, safer, and with better results underground.